Scanning
This section goes over how I personally scan. I do not debind the book, nor do I have the scanner level the image for me, so this is rather simplistic. That said, hopefully this will be an easy visual guide for new scanners on how to get HQ flat scans from their books.
First of all, you'll need to access your scanner's software. I use a Cannon scanner, and can access the installed software directly through Photoshop (File>Import>Scanner). Here's a snapshot of the advanced tab of my software:
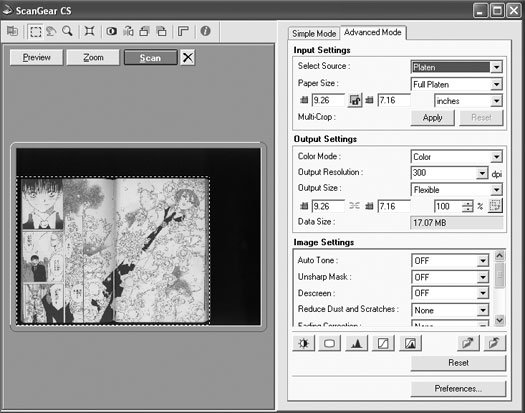
This tab contains a whole bunch of stuff that I don't know a thing about. All that matters to me are three settings: Color Mode, Output Resolution, and Auto Tone. These may be called something slightly different in your software (Auto Level, perhaps), but should be recognizable. Auto Tone/Level should always be set to OFF. For color images, set "Color Mode" to "Color", and "Output Resolution" to 600dpi. For black and white images, set "Color Mode" to "Grayscale", and "Output Resolution" to 300dpi. Simple as that!
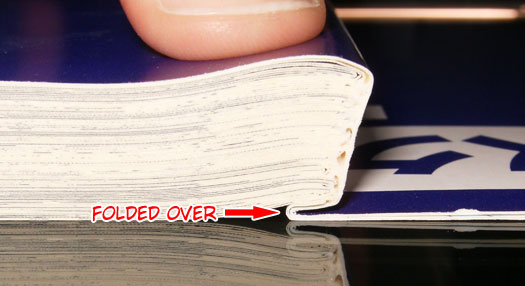
Now, how to actually scan the book. First of all, take off the cover so it doesn't get in the way. In the beginning, you'll be able to get the book to lie flat by just opening it, folding the cover back, and pressing on the spine, as below:
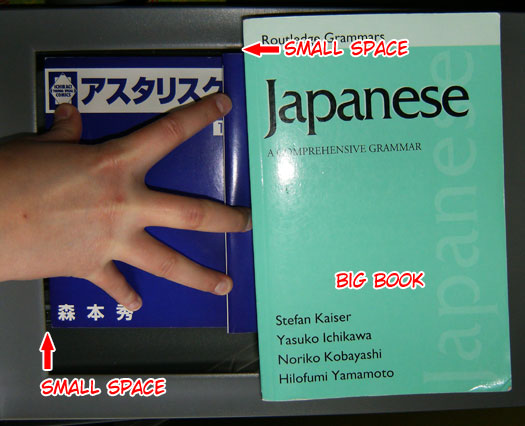
Below is how I scan my books. I scan two pages at once. I cover one flap with a heavy book (or even another manga volume), press down hard on the spine with my fingers, and use the rest of that hand to press down on the open flap of the manga. Of note, I leave a space between the book and the edge of the scanner, because my scanner cuts off a small section of the image if it's right at the edge. Your scanner may not.
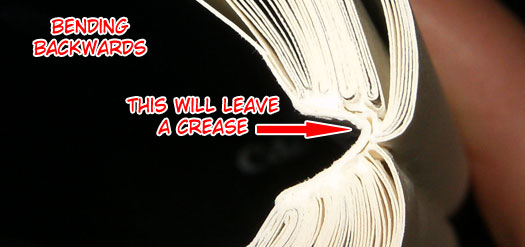
Now, once you're a few pages into the manga, it's time to really flatten the book. At this point, you should be able to bend the front cover/first few pages all the way back so you'll be able to see the spine. By bending it back, it loosens the spine (usually creasing it), and allows you to press the book all the way down (instead of merely folding it over, which causes you to lose the image near the gutter). Don't worry, this bending and creasing shouldn't cause the book to fall apart; none of mine have. Below are some images to demonstrate.

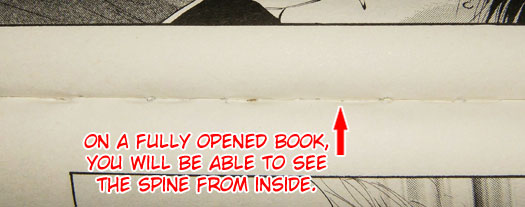
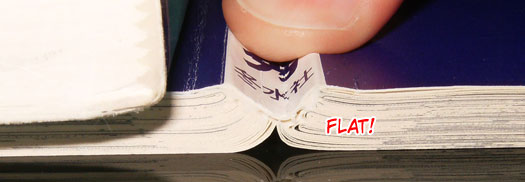
And that's that. I may add a scanning mistakes section later, but this should give you the basics on one easy technique for scanning.
Now, once you've scanned the image in, you can save it as either a high-quality jpg, png, or even just as a psd file. Different groups have different standards, but a 60% quality jpg gives you a small filesize and good image integrity (you may want to save color images at 80%). Tadaa!


